The Benefits of Printing a Booklet in Publisher

Ever thought about printing a book or a booklet, but you don’t have the time to learn a new program or mess around with the confusing processes that come with traditional formatting and publishing platforms? Good news, you don’t have to! The Ex Why Zed print journey is novice friendly and super easy.
Professional Printing delivered in days from your Publisher PDF file
Design your booklet in Microsoft Publisher and ultimately all we need to print your project is a PDF.
5-Steps to Saving a PDF as Print Ready Artwork in Publisher
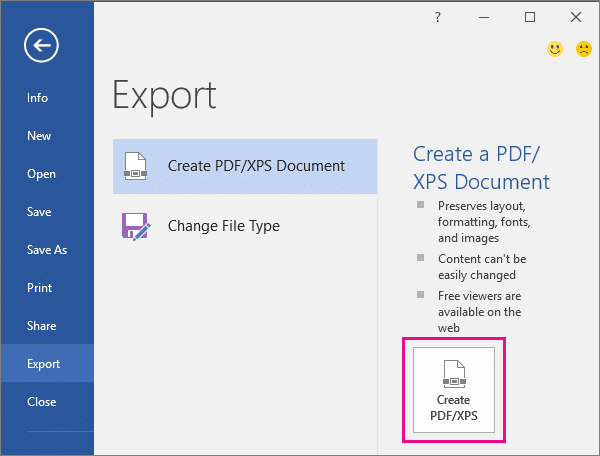
1. Design your layout in Publisher first, then when you’re happy it all look good, choose File > Export > Create PDF/XPS Document > Create PDF/XPS.
2. Add a File name for the publication.
3. For Save as type, select either PDF or XPS Document.
4. Click Options and choose the publish option best for online or print viewing of your publication:
At this stage, we recommend choosing the maximum setting to save your file. This will ensure you images print crisp and in focus on our presses. So choose Commercial Press.
5. Click OK, and click Publish. Easy!
Professional Booklet Printing
Whether you’re trying to print a professional-looking brochure for your company or just a keepsake for a family gathering, the benefits of printing a booklet in Publisher are plentiful. Today, we’re gonna take a deep dive into how this fantastic tool can make your booklet printing process a breeze, and some of the big benefits that come with it.
Easier to Print
It’s easy printing a booklet in Publisher. When you create a booklet in Publisher, the pages of your document will be automatically grouped together and arranged as required by the printer. You’ll find that it’s much easier to print your booklets than if you were trying to do that using a completely different platform. We just need one PDF file in reading order – simple!
Why go for booklets instead of full-sized books or magazines? Booklets are more portable than books. If you want something small enough for a pocket or purse, why not consider having a custom booklet printed? Choose any size larger than A6, through A5 and A4, up to an including a maximum height of 420mm and a width of 297mm. Yes at Ex Why Zed, we can print all custom sizes from A6 to A3 wire stitched booklets.
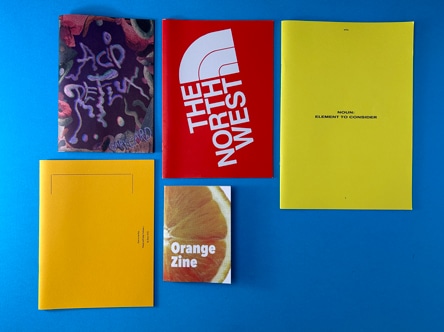
Booklets are also more affordable than books. Because they have fewer pages (usually), it’s less expensive for publishers to produce with the added incentive that these types of documents can contain just as much information as larger print formats.
More Professional
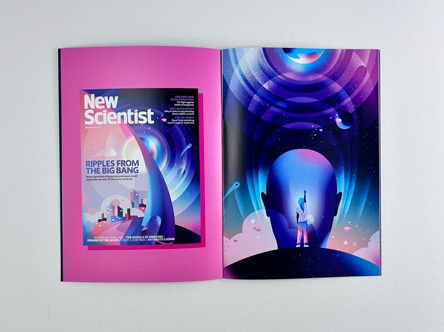
The cover of the booklet can be made more professional with the right tools. You can choose from many different pre-designed templates and fonts, or you can select the text, a picture, and background colour to create your own.
You can use Publisher to format your text for easier reading. This includes changing the font size, line spacing, and margins. You can also apply formatting like italics or underlining to single words or lines in your text.
When digital printing booklet A4 folded formats in Publisher, there are more paper options available than when you print from Word. For example, you can choose between having only one side printed (called “single side print”) or two sides printed (called “double sided”).
A Deep Dive into Creating a Booklet in Publisher
Let’s start by creating a new document.
You can create a booklet in Microsoft Publisher by following these steps:
Step 1: A Grand Opening
First things first, find the Publisher icon on your desktop or Start menu. Give it a double-click – it’s like knocking on the door of creativity!
Once the program launches, you’ll be greeted with a host of pre-designed templates. “Booklets”? “Flyers”? Or perhaps you fancy a “Newsletter”? The choice is as vast as the seven seas.
Step 2: Starting With A Blank Canvas (or not!)
Fancy a template? Simply click on one that tickles your fancy. It’s like choosing the perfect paper for your print masterpiece.
For those brave sailors wanting to chart their own course, click on the ‘Blank Page Sizes’ option.
Step 3: Setting Your Sails (Page Setup)
Here, you get to decide the size of your canvas. A4? A5? Or perhaps something a bit more exotic? The world is your oyster!
Adjust the orientation. Portrait for those tall tales, or landscape for those wide panoramas.
Once you’ve tweaked these settings to your heart’s content, click on ‘Create’.
Step 4: Unleashing The Inner Artist
On the left-hand side, you’ll find a variety of tools and design elements. Everything from text boxes to glorious images. Drag, drop, write, and design away!
Don’t forget to save regularly. It’s like dropping anchor to secure your spot!
Step 5: Proofing Like A Print Rockstar
Before setting sail to the final destination, always review your work. Spelling errors? Misaligned images? Sort them out.
Remember, as the folks at Ex Why Zed would say: a well-reviewed document is like a perfectly printed page – it leaves an impression!
A Recap on Saving your PDF in Microsoft Publisher
Step 1: Summon the File Menu!
Navigate to the upper-left corner and click on that trusty ‘File’ tab. It’s like the North Star guiding us through the sea of options.
Step 2: Delve into ‘Export’
In the left sidebar, there’s an option that whispers… ‘Export’. Aha! That’s where our treasure lies.
Step 3: ‘Create PDF/XPS Document’ Awaits!
Now, your screen will be presenting you with a gleaming option: ‘Create PDF/XPS Document’. Click on the button right next to it aptly labelled ‘Create PDF/XPS’.
Step 4: Crafting Your PDF
A dialogue box appears, as if by magic. Here’s where you name your masterpiece. Perhaps something catchy like ‘PrintMagicByExWhyZed’? ?
Make sure the ‘Save as type’ is set to ‘PDF’. It’s our vessel to the world of portable documents.
For the best quality (especially if it’s destined for the expert hands at Ex Why Zed), click on the ‘Options’ button. Ensure ‘High Quality Printing’ is selected.
Step 5: Save and Marvel
Once satisfied with your settings, click ‘Publish’.
Voilà! Your Publisher document is now a radiant PDF, ready to dazzle any viewer on any device.
Ready to place an order?
Well done on getting your artwork ready for print! Now go ahead and upload the file/s using WeTransfer.com
It is super easy, free and you don’t need an account. Add hello@exwhyzed.fixed-staging.co.uk in the ‘Email to’ box. In the message area, tell us your print spec, number of copies you would like to print and the best address for delivery. We then get a download link with your files, simple as that!
10 Reasons Why Publisher is a Useful Artwork and Design Program
Let’s embark on a whirlwind tour of Publisher’s USPs that make it a solid option for designing books and booklets on your PC.
1. User-Friendly Interface: Publisher’s intuitive design ensures even novices feel like seasoned pros in no time. A clean, clutter-free workspace means you can focus on crafting, not fumbling.
2. Vast Template Library: Dreaming of a sleek brochure or a vivid catalogue? With its expansive range of pre-made templates, you’re never starting from scratch. It’s like having a seasoned designer whispering in your ear!
3. Customisation Galore: Fancy a touch of personal flair? Publisher doesn’t just let you edit templates, it encourages it! Transform every inch to mirror your unique vision.
4. Seamless Integration: Already in the Microsoft ecosystem? Ahoy! Easily pull in data from Word, Excel, or Access. It’s like having your entire toolkit in one drawer.
5. Dynamic Image Handling: Wrap text around an image or crop it right within the software. You’re not just placing pictures; you’re weaving a visual narrative.
6. Precision Design Tools: Get pixel-perfect placements with rulers, guides, and alignment settings. It’s the attention to detail that’ll make your booklet pop off the page.
7. Print & Digital Harmony: Crafting for print or the digital realm? Publisher ensures your designs are optimised for both. In 2024, versatility is the name of the game!
8. Professional Printing Compatibility: Ready to bring your booklet to life? With Publisher’s advanced settings, rest assured your file is print-ready, whether you’re partnering with legends like Ex Why Zed or another print maven.
9. Language & Accessibility Tools: Reach a global audience! Publisher supports a plethora of languages and boasts accessibility tools, ensuring your booklet resonates with every reader.
10. Continuous Updates & Features: It’s 2024, and Publisher isn’t resting on its laurels. Regular updates mean you’re always equipped with the latest and greatest design tools.
In essence, Publisher in 2024 is like a swiss army knife for booklet design. Whether you’re dabbling in design for the first time or are a seasoned booklet guru, Publisher’s balance of ease, precision, and power ensures your vision is not just realised, but celebrated. Dive in, let those creative juices flow, and remember, every page is a canvas waiting for your story!
Publisher is a powerful tool that can help you create professional-looking booklets meant for lamination in no time. With its intuitive layout and design features, booklets are easier than ever to create and work on. Publisher also comes with many templates so you can get started right away whether you’re creating a printed Bookazine or online content.
The best printing companies are those that provide high-quality and affordable cost of printing A4 booklets. Ex Why Zed is one of the leading printing companies in the world and offers some of the most competitive prices in the market. The company has a team of highly skilled and experienced professionals who use the latest technology to produce high-quality prints. Ex Why Zed also offers a wide range of services such as design, layout, and printing of business cards, flyers, brochures, and much more.
So if you’re looking for a reliable and affordable printing company, check out Ex Why Zed. Contact us today and get a free quote for your printing needs.
Everyone needs a helping hand to get started with Publisher. In this guide, we’ll answer some of the most frequently asked questions about self-publishing and printing booklets.


